1935 - 1936 Steering Gear Swap
I. General Procedure for steering wheel replacement and/or steering gear replacement.
1. Disconnect the battery
2. Remove L.H. splash shield. This would require removing the steering arm. However, if you are not too choosy about the paint on the pan you can get away with just removing the three 1/4 bolts and let it hang for the time being. If you are going to replace the entire gear assembly, its gotta go.
3. Un-snap the spring wire clip that holds the light bail to the bottom of the steering column. Pull the bail straight out and push it aside.
4. You should find a small "C" shaped clip that holds the switch fork and spring to the light rod. Remove. Caution the "C" clip is smaller than a dime and is very easy to loose.
5. Remove any two bolts of the steering gear box to frame. Loosen the third. I usually leave the top bolt.
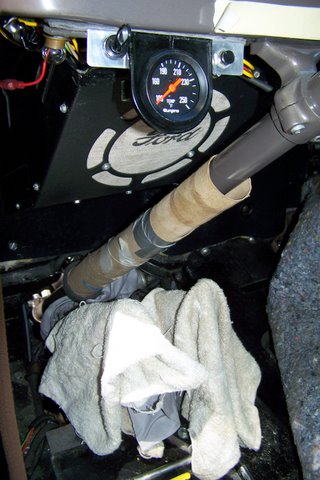
6. At this point I usually take a couple of old paper towel cardboard tubes, split them and slide them over the steering column to prevent any potential denting or scratching.
7. Remove L.H. floorboard. This will require removal of pedal pads and accelerator rod.
8 Depending on the type and the routing of the battery cables, you may need to remove the starter switch. About 1/2 the time I need to do this. If possible, try to avoid removing the starter switch. The cables are somewhat hard to reattach due to the short terminal studs on the stock pedal switch. However, if you are going to remove the gear you need to remove the starter switch and cables.
9. Stuff a lot of rags on top of the starter switch. This way when the column drops you won't be scaring the paint on the column.
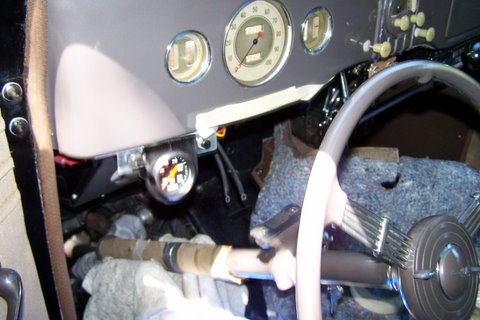
10. It is awkward but you need to remove the two 5/16" bolts that hold the steering column to the dash (commonly called the "steering drop"). These things come out fairly easy but are a pain to put back in.
11. Drop the steering column and carefully pull out the light rod. I have a roll-down rear window on my coupe so I usually just roll down the window and let the light rod go out through the window opening. If you don't have room to pull the rod out (things are tight), you may need to drop the entire gear assembly down to give yourself more room. Regardless, DO NOT bend the rod. I know this seems like a lot of work (it is) but you need to go this route because the light rod is too long to pull straight up and out. I have seen numerous cases where the rod was bent in an effort to get it out only to have an inoperative light switch and/or horn when everything is put back together. I one case I remember, the car's lights would come on when a corner was turned! The light switch MUST be as straight as possible to work correctly. This light rod arrangement was NOT one of Henry's better ideas.
12. Remove the steering wheel. Ford did not put any puller holes in the wheel which can make things a little more challenging. However, it can be removed without damaging anything, if you follow a few simple guidelines.
a. Do not beat on the backside of the steering wheel to get it off. The best way I have found, is to loosen the clamp on the bottom of the column (near the gear box) and slide the column down. It should go down about 3/4" which in turn gives you a 3/4" gap between the steering wheel hub and the steering column flare. Put some masking tape around the lower hub surface and the flare of the steering tube to prevent scratching.
b. Remove the steering nut. Use a pin punch and tap on the bottom of the hub in the "gap" you created on the previous step.
c. The wheel may take some "coaxing" but it WILL pop-off.
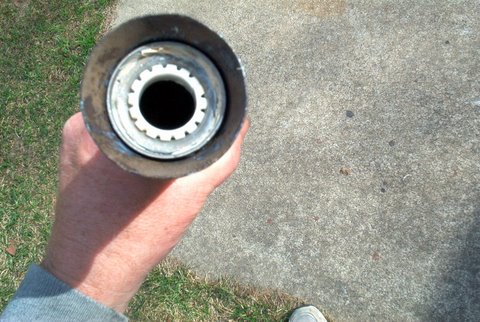
13. The column tube can now be pulled off. Once off, use a piece of wood or a 1" socket with a bunch of extensions and drive the upper rubber bushing out.
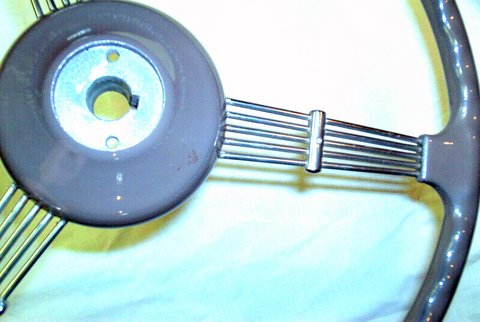
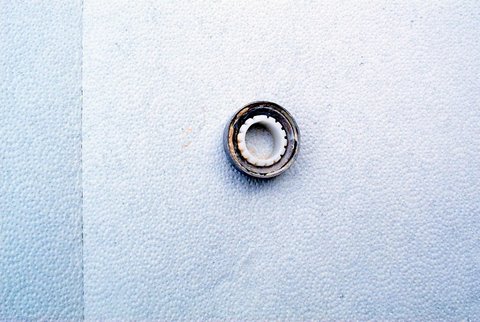
14. Installing the "new" upper steering bearing. Originally, the early Ford steering shaft was centered in the column housing with a rubber bushing. There were no moving parts to this bushing which meant you were constantly fighting friction between the steering shaft and the bushing as you turned the wheel hence the term "steering by armstrong." Since you have everything apart you might as well update things. There are several vendors who sell modern bearings that can replace the bushing with no modification to the column tube. I use a bearing from a '49-'72 Ford steering column (C3DZ-3517A, B1AZ-3518A, pictures enclosed). It is composed of three parts, the bearing, a plastic collar and a small coil spring. The entire bearing assembly is under $10 and was available (I am not sure it still is), from your local Ford dealer. It will fit perfectly in your '35-'36 column.
a. Re-install the gear assembly and column tube.
b. Bearing drops into place and centers itself.
c. Add the plastic bushing.
d. Add a flat washer, a small coil spring (I used an old fuel pump diaphragm spring).
e. Install the steering wheel key. It holds everything in place.
f. Done !
15. If this whole process of removing the steering wheel seems kinda "scary", Brattons ( the Model A folks) are now selling a wheel puller for the Model A that might work on early flatheads. Click here for Item 05705
16. If you are only replacing the steering wheel this is the last step just reverse the procedure to put everything back together. 17. Some things to consider:
a. I would drill and tap a couple of 5/16" coarse-thread holes in the steering wheel hub just in case you need to remove the wheel again, at some later date.
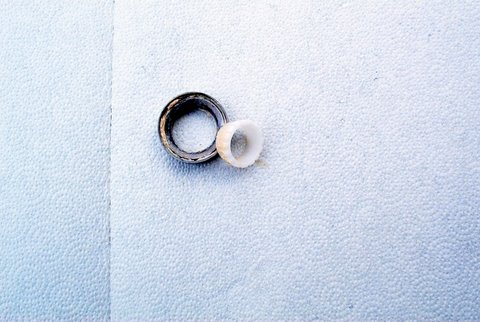
b. You should have a very thin brass sleeve on the under-side of your light switch hub (steering wheel end of shaft) that wraps around the light rod. This sleeve prevents the light switch rod from rattling inside the steering shaft rod. These are often "lost" over time. What I did was drill out the top of the steering shaft hole about 1" deep. (not sure of the drill bit but I think it was a "P"). I cut the end off a .38 Special shell casing, split the shell, removed all the burrs and put it around the light switch shaft. Works great ! Update- I also have a '31 coupe which means I am also on the look-out for Model A parts. The new Bratton's catalog is now listing this missing bushing for $1.50. Click here to check-out item 05050
II. Replacing the '35-'36 steering gear assembly with a 1937-40 steering gear assembly
If you going to replace the gear assembly, you will now need to remove the third bolt that is holding the steering gear to the frame and pull the entire gear assembly up into the interior of the car. You will need to rotate the assembly slightly to clear the pedals. You may find it necessary to remove the cotter pin holding the brake pedal to the master cylinder rod (assuming hydraulics and you are using a '39 pedal assembly), to drop the pedal to the floor for more removal room. If you don't have hydraulics just unfasten the return pedal spring and remove the clevis pin and let the pedal drop. However, It is possible to push the pedal down and wedge a bar between the pedal and floor to hold the arm down. Things are kinda tight but you can wiggle the gear out.
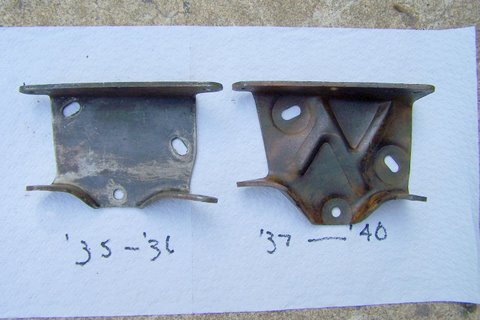
Mounting the gear- At this point you two options. The first is to drill a new mounting hole in the '37-'40 replacement gear approximately 3/4" below the upper mounting hole in the gear casting. This will allow the replacement gear to be bolted directly to the existing '35-'36 mount. This will work but (in my opinion) looks somewhat "crude." The second option is to remove the four rivets that hold the original plate to the frame and replace it with a '37-'40 plate. I went the latter route and bolted the plate to the frame with carriage bolts to give the appearance of a "factory" installation. By using the '37-'40 mount you will drop the gear end slightly but it is not really noticeable. However, it does change the angle the gear assembly enters the car. This will necessitate re-cutting your floorboard slightly to accommodate this change. After re-cutting the board you will have a somewhat larger gap between the column tube and the floorboard. This can be cleaned-up by simply visiting your local hardware store and get a 1.5" pipe plate such as those commonly used around plumping fixtures such as toilets.
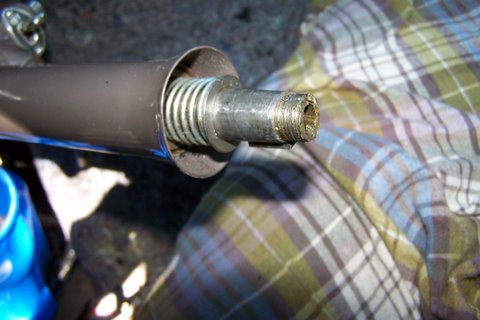
On the steering shaft you will find a metal collar which is used to lock the steering gear when the key is removed from the on-off switch. To use the '35-'36 steering tube with the later gear you must move this collar down 1/2". Your locking assembly will now work as original. The distance from a '35-'36 steering housing to the collar is 31". With the '37-'40 the distance is 31.5".
As mentioned previously, when completed you will note that the new gear assembly is on a somewhat steeper angle which creates a "gap" between the steering wheel flare and the steering column tube. To reduce this gap you need only loosen the column drop and move the tube upward until the gap is about 1/16". To loosen the column drop you need to remove the "break-off" bolt that holds the clamping side of drop together. To do this drill a 3/16" hole into the bolt and use an easy-out to un-screw the bolt. When re-assembling I use an Allen-head bolt. If you go this route you could have about a 3/16" paint scar on the column where the old clamp use to be. A quick (and neat) fix is just to paint a piece of 3/16" pinstripe tape the color of your column and cover the scar. If you are really a perfectionist, your only option is to repaint the entire upper column, which is a super pain.
Bottom electrical hook-up - A couple of things. First, in order to handle your lighting bulb you need to use a '37-'39 tube and plate assembly (78-3597) along with that a bail spring (78-3647) and a '37-'39 light bracket (78-3569). You cannot use a '35-'36 assembly (different bolt arrangement). There are a couple of repo tube and plate assemblies being sold. In both cases I found the tube section (which was steel) to be too thick to fit inside the steering shaft opening, so you may be stuck trying to find a good original, if you don't have one. Incidentally, check closely where the brass tube meets the steel plate. It is not unusual that cracks occur in this location. If not addressed you will have a gear oil leak. The smaller light bracket which the lighting bulb fits into is not being reproduced (that I am aware of). However, you can still use a '35-'36 bracket. It will bolt on to the bottom of the '37-'40 gear assembly but you need to re-slot it to accept the lighting bulb.
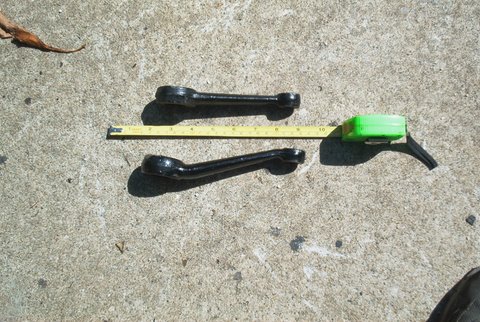
Steering gear arm - Three general types of steering arms are available, A summary of the three are listed below:
11A-3590 - sharp turn to the right causes the arm to hit the left-hand wishbone. If reinstalled to the next tooth pattern, the drag link will hit the oil pan.
78A-3590 - This arm as a bend. It will work but you need to grind out some of the "teeth" and use it upside down.
48A-3590 - This arm will work fine, however it is approximately 1.25" shorter than the 11A or the 78A. This may cause a minor amount of additional steering effort but it is very minor. This is what I am using on my '35.
Engine pan - The original '35-'36 engine pan will not fit the new gear assembly. If you wish to retain a pan, you will need to go with a '37-'40 unit. I just truncated the front part of the later replacement pan to accommodate the '35-'36 front crossover pipe, painted it gloss black and installed. The bolt holes on this pan will align perfectly with your existing '35-'36 frame holes. Result- looks "factory.."
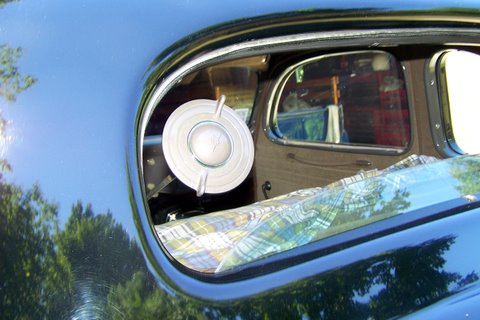
Helpful Pictures - Click on a picture for a larger version in a new window.